Table Creation
Note: Large tables and tables with complex formatting should be uploaded as a image file (see Figure Creation). When uploading a table as an image the title of the table should be included in the “Caption” section and the “Label” section should be left blank.
Table Creation
To create and insert tables into your article, follow these steps:
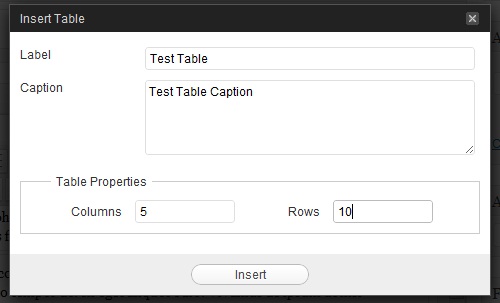
Select the “insert a new table” button on the menu toolbar, and open the table editor.
The table editor will allow you to create and edit simple tables, using the following operations:
Use the table properties to specify the size of the table you want.
If you want a larger table later, you will still be able to add additional rows and columns via the ‘insert’ buttons.
The rest of the operations are available on the menu toolbar, but are enabled only when your cursor is inside an existing table.
- Insert Row Before – Create a new row, above the current one.
- Insert Row After – Create a new row, below the current one.
- Insert Column Before – Create a new column, before the current one.
- Insert Column After – Create a new column, after the current one.
- Delete Table – Delete the current table. You can also delete an entire table by clicking and dragging to select it, then pressing delete. If you accidentally delete a table, use the ‘undo’ tool, or ctrl+z.
- Delete Row – Remove the current row.
- Remove Column – Remove the current column.
- Split Merged Table Cells – Separate the selected merged cell into individual cells.
- Merge Table Cells – Merge two or more selected cells into a single cell.

